Import a well into GeoSyn from IHS Kingdom in order to create synthetic models based on Kingdom wells or seismic.
When launched from Kingdom, a sub directory named GeoSyn is created under the Kingdom project directory. All GeoSyn data associated with the created model is written to this location.
To import well(s) from Kingdom:
1. From within Kingdom:
- Right-click on a single well on the base map or Project Tree and select GeoSyn from the context menu. This will launch GeoSyn and give you the option of importing the well using Quick Start.
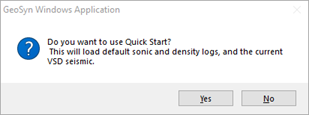
- Select Yes to automatically import the well using the default sonic, VSD seismic, and density logs bypassing the need to manually enter the information.
- Select No to import the well and manually enter your information using the procedure described below.
- From the Kingdom ribbon Project > Launch > More > GeoSyn.
Opening GeoSyn from the Kingdom ribbon (Project > Launch > More > GeoSyn) imports data for all of the wells on the Kingdom project's visible well list. Some of the wells on the Kingdom base map may be hidden, but can still be retrieved using GeoSyn at any time.
The Kingdom Data Browser dialog box opens.
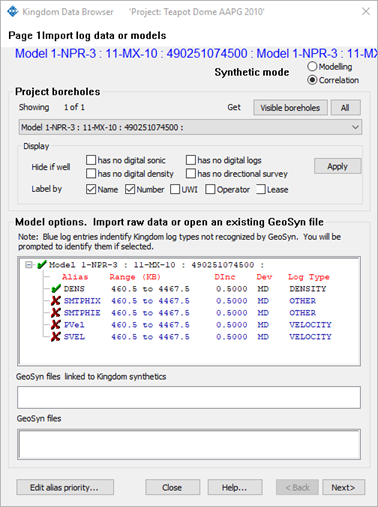
- Filter the results displayed in the drop-down list near the top of the dialog in which you select the wells by clicking check boxes to the right of the Hide if well label, and select the columns to display in the Model Options pane by clicking check boxes to the right of the Identify by label.
- Where the well includes a directional survey, select whether to convert it to true vertical depth.
- If you selected a model above, an Open button appears in the bottom-right of the above dialog box and when clicked, immediately opens a new or existing GeoSyn synthetic.
- If you selected Log(s) above, the Next button appears in the bottom-right of the above dialog box that when clicked, displays the Kingdom Data Browser dialog box, where you apply corrections to the data and select display options for the resulting model before launching GeoSyn.
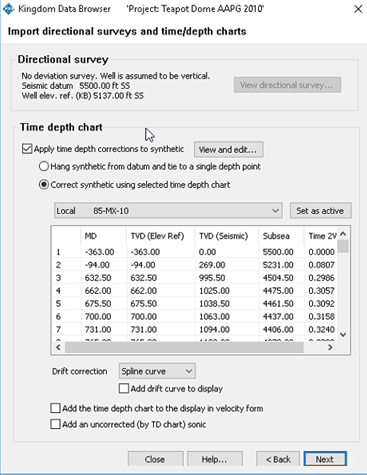
- Make selections in the dialog box above and then click Apply. If you tie the synthetic to a single depth point, click View and Edit to display the Time/Depth Quality Control dialog boxes where you apply changes to the time depth curve before applying it to the sonic.
Note: In order for changes made using the Time/Depth Quality Control dialog boxes to be applied, upon exiting that dialog box, when the Save Modified Time/Depth Chart dialog box opens, you must click Save. - The synthetic is created based on the well imported above. The above dialog box remains visible and the Apply button changes to an Undo button in case you want to apply different data correction options or select a different depth chart. The Back button also remains active in the above dialog box so that you can add additional logs to the model. If importing additional logs, GeoSyn warns you so that you don't inadvertently apply the same time depth chart twice.
- Tie the imported seismic section to a model (for details, see Related topics below).
- From the File menu, click Save.
This option is only available in GeoSyn when it's launched from Kingdom.

- Specify the outputs to save that can be used by Kingdom, and then click Save.